Starting From Seed
I have only ever tried 3 different ways to start something directly form the seed: water sprouting, direct seeding, and stratification.
Water Sprouting: I used water sprouting for the bell pepper plants, Mister and Misses, and the process was simple. Simply collect about a dozen seeds from the inside
of a freshly cut bell pepper. Put into a glass container filled with water and set in a sunny place.
In a matter of weeks, some of the seed will begin to sprout. After the sprouts reach somewhere
between half and a whole inch in length, transplant them to soil. Bury less than an inch from the surface
and water once a week.
Direct Seeding: For the herbs and the jalapeno pepper plant I used basic direct seeding. We bought 4 different types of herbs to
initially put in the Nursery. We simply spinkled half the pack of seeds on top of moist soil in 4 different pots
and within 2 days, green sprouts were everywhere. Unfortunately, after about 4 weeks only
one of the original 4 herb pots still had green in them. All the others had died. My only guess
was underwatering. So I began to spritz the remaining pot of herbs daily. This has seemed to
work so far. I will provide updates over time.
The jalapeno pepper was similar to the herbs, just over a longer time scale. I took about
20 seeds from a store-boughten jalapeno pepper and put half in a glass container filled with water,
and the other half less than an inch into soil. After about 3 to 4 weeks of daily spritzings, a small
green sprout broke ground. It has continued to grow at a somewhat satisfactory rate. However,
I sense that once summer comes, it will take off. The seeds that I had tried to water sprout never took off
and were eventually tossed out.
Stratification: Stratification is a relatively new process to me. I understand it in principle, but
have yet to carry it out successfully (though my most honest attempt is currently underway). Basically,
stratification is the process of tricking seeds into thinking they've experienced a regular winter and
it is now time to germinate. I have found various ways of how to achieve this littered across
the interweb, but the basic method is this: Take your seed and put it in either moist peat-moss
or clean moist sand. Then either put it in your refridgerator or some secure place outside (during the winter)
for anywhere from 3 to 6 months. After the wait, sow the seeds in moist soil and provide ample sunlight
and moisture (but not too much). This process is suppose to work for apples, grapes, holly berries, and
just about anything else that comes from a winterous climate. I have tried it with the these three specific
plants in three different ways.
For the apple seed I had read that keeping the seed inside the fruit and just storing the fruit for
3 month in your refridgerator would suffice. After completing this, I suspended the seed in
a state similar to water sprouting and put it in the Nursery. After 2 months of nothing, the seeds
became covered in mold and had to be discarded.
 The holly berries were subjected to a completely different treatment. I first made sure to remove
all of the flesh of the berry from around the seeds. Then I got a small
zip-lock bowl and filled it with clean, moist sand, burying about 2 dozen seeds by about half an inch.
Then for a period of 6 weeks (and maybe longer, as I am only currently on week 4), every Sunday
night the seeds were moved to the freezer and every Monday night returned to the lower part of the
refridgerator for the rest of the week. This is being done because I read that holly seeds need to be exposed
to a series of freezes and thaws in order to crack open their hard shell. When the time comes
I will sow them in moist soil in lots of sunshine and see what happens. Then I will report back to here.
The holly berries were subjected to a completely different treatment. I first made sure to remove
all of the flesh of the berry from around the seeds. Then I got a small
zip-lock bowl and filled it with clean, moist sand, burying about 2 dozen seeds by about half an inch.
Then for a period of 6 weeks (and maybe longer, as I am only currently on week 4), every Sunday
night the seeds were moved to the freezer and every Monday night returned to the lower part of the
refridgerator for the rest of the week. This is being done because I read that holly seeds need to be exposed
to a series of freezes and thaws in order to crack open their hard shell. When the time comes
I will sow them in moist soil in lots of sunshine and see what happens. Then I will report back to here.
Finally, the grape seeds were given a somewhat more careless version of stratification. For them
I simply took the seeds directly out of the fruit, put them into a ziplock bag with some regular potting soil,
and put it in the bottom of my refridgerator. I plan to remove them in 4-6 months and sow into moist soil with lots of sun.
Again, I will report back when I have something to report.
Return to Methods List
Starting From a Cutting
 I started all of my jade plants (except for the original Phoenix) from the cutting of another one.
The process works really well for jade plants and supposedly also works well for some types of herbs.
I started all of my jade plants (except for the original Phoenix) from the cutting of another one.
The process works really well for jade plants and supposedly also works well for some types of herbs.
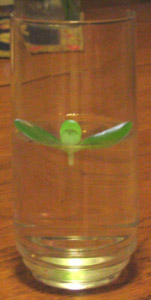
For all but one of my jade plants, I collected a cutting that had fallen naturally (or through an
accidental disturbance) and simply put it into water and provided lots of sun. The only real precaution
I took was to make sure that the cutting wasn't completely submerged in water; it must still be able to breathe.
It worked best when I could use the stiffness of the foilage to keep it propped out of the water, similar
to what's shown to the right. After about a month, a stable root system will form. Once the
new roots reach 1 to 2 inches in length (or become adequately developed), transplant the cutting to soil, making
sure to completely bury the new root system and about half of the original cutting.
The only one of my jade plants that I didn't use this method for was Phoenix 2. He was grown through
a much more difficult process. After Phoenix died, I let the leaves that he had dropped remain
in his pot. I continued to water it like normal. After about 2 months, most of the leaves
had dried out and shriveled up except for two that had rooted into the ground. After another month
only Phoenix 2 remained. It has since grown fairly well. I don't recommend this more natural
process if you just want to start a jade plant. I only recommend it in the case that you
want to witness for yourself the robustness of the jade plant.
Return to Methods List
Purchasing From a Store
I've only bought 4 of my plants from the store: Musashi,
Merry, Damion, and
Cruella. And really,
picking out a plant at the store is a no-brainer. (I don't know why I even bothered putting this section
on this page.) Basically, you want to look for which plant out of the bunch looks the healthiest.
If the type of plant you're looking for is about to bloom, I advise buying one whose blossoms
haven't opened quite yet as this will lengthen the amount of time you will have the flowers all to
yourself. Another random piece of advice is to look around before spending lots of money on a specific
plant. If you just wait for the right time of year, you can find your plant at a much more reasonable
price. Also, at places like Ikea, they sell their plants in a variety of sizes with often the
smallest only costing 1/10 the price of the full-sized version. Lastly, be careful of the soil
that you plant comes in. With one of the plants I bought, after the first time watering it, I noticed
a disgusting hive of worms surface out of the soil to avoid drowning. I can't imagine they could be
good for my plant and I definitely didn't want them to get out of that pot. Hence I tried to
remove as many of them as possible. The moral is, however, that you never know what
might be lurking in the soil of a boughten plant. Though I don't really know the best
way to prevent anything malicious from surprising you down the road.
Return to Methods List
Back to the Plants Main Page
Back to the Projects
Back to the Main Page
